惊喜揭秘:AI绘画软件的一键换脸教学
Table of Contents:
- Introduction
- Midjourney and its Features
2.1. Midjourney Overview
2.2. AI and Web3 in Midjourney
2.3. Newcomer's Guide to Midjourney
2.4. Midjourney Discord Setup
- Exploring Midjourney's Functions
3.1. Using the Imagine Command
3.2. Understanding the Aspect Ratio Parameter
3.3. Exploring Different Aspect Ratios
3.4. Introducing the Version Parameter
3.5. Niji Model: A Special Version
- Enhancing Images with Midjourney
4.1. Upscaling and Variation
4.2. Understanding the Refresh Button
4.3. Exploring the Varieties of Vary
4.4. The Zoom Functionality
4.5. Creating Custom Zoom Levels
4.6. Making Images Square
4.7. Performing Pan Operations
- Remix Mode and Vary Region
5.1. Introducing Remix Mode
5.2. Modifying Specific Regions with Vary Region
5.3. Leveraging Vary Region with Remix Mode
- Additional Features and Resources
6.1. Liking and Collecting Images
6.2. Exploring Midjourney Community Feed
6.3. Accessing Learning Resources
6.4. Interacting with Image Details
6.5. Evaluating and Saving Images
6.6. Following Authors and Giving Feedback
- Conclusion
Introduction
Welcome to my Channel! I'm 暗夜飞行, and I specialize in the AI and Web3 fields. In this series of beginner-friendly videos, I will guide You step-by-step on how to use Midjourney, a powerful tool in the AI and image manipulation domain. This episode builds upon the previous one, where we learned about Discord registration, the basic prompt command in Midjourney, and how to Create private channels. In this video, we'll dive deeper into the topic and explore the AR (aspect ratio) parameter and the different versions of Midjourney. Let's get started!
Midjourney and its Features
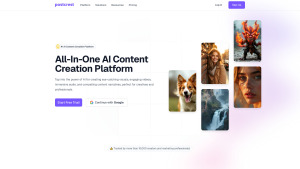
Midjourney Overview
Midjourney is an innovative tool that combines artificial intelligence and Web3 capabilities to create stunning images. Whether you're a beginner or an experienced user, Midjourney offers a wide range of functions and features to enhance your image manipulation experience.
AI and Web3 in Midjourney
By leveraging the power of AI and Web3 technology, Midjourney ensures that users have access to cutting-edge image generation and editing tools. With the AI models integrated into the platform, you can transform your ideas into visually captivating images. Web3 integration allows for seamless collaboration and sharing within the Midjourney community.
Newcomer's Guide to Midjourney
If you're new to Midjourney, don't worry! This series of videos is designed to provide you with a comprehensive beginner's guide. From zero to one, I will walk you through each step of using Midjourney, ensuring that you have a solid foundation in understanding and utilizing its features.
Midjourney Discord Setup
To fully experience the power of Midjourney, it's essential to set up a private channel on Discord. This allows you to work on your image creations without the distraction of public channels. In the previous episode, we covered the process of Discord registration and channel creation. If you missed it, I highly recommend checking it out before proceeding with this video.
Exploring Midjourney's Functions
Using the Imagine Command
Let's start by refreshing your memory on the image generation command. By typing "/I IMAGINE" followed by a description of the image you want to generate, you can unleash the creative powers of Midjourney. For example, if you want to create a scene from Star Wars with Boba Fett escorting Princess Leia wearing a veil in the artistic style of Ralph McQuarrie, you can describe it in the prompt.
Understanding the Aspect Ratio Parameter
Midjourney has a default aspect ratio of 1:1. This means that if you don't specify the aspect ratio using the "ar" parameter, the generated image will be in a square format. However, you have the flexibility to define your desired aspect ratio, such as 16:9 for a cinematic feel or 9:16 for smartphone wallpaper-like images.
Exploring Different Aspect Ratios
In this episode, let's revisit the Discord channel in Midjourney to experiment with the aspect ratio parameter. By adding the "ar" parameter followed by the desired aspect ratio (e.g., 16:9), you can create images with different Dimensions and proportions. Let's see how an image with a 16:9 aspect ratio differs from a square image.
Introducing the Version Parameter
Midjourney is constantly evolving, with regular updates and new versions. By default, Midjourney uses the latest version (currently 5.2). However, there are instances when you might want to use a specific version or a unique model like Niji. I'll explain more about Niji and its special anime-style image generation capabilities in a separate video.
Niji Model: A Special Version
Niji, also known as the anime model, is a special version of Midjourney that focuses on generating images in an anime art style. If you're interested in creating anime-style images, Niji is the perfect model for you. In a future video, I will demonstrate how to use Niji and showcase the high-quality results it produces.
Enhancing Images with Midjourney
Upscaling and Variation
Once Midjourney generates an image, it presents a GRID of four variations of that image. The first row contains "u" buttons, which stand for upscale. These buttons allow you to enlarge specific images without additional GPU usage. The Second row contains "v" buttons, which stand for variation. These buttons introduce subtle changes to the selected image.
Understanding the Refresh Button
If you're not satisfied with any of the variations displayed after generating an image, you can simply click the refresh button. Midjourney will generate a new set of variations for you to choose from. This flexibility ensures that you can achieve the desired image outcome by exploring different options.
Exploring the Varieties of Vary
The "vary" functionality in Midjourney allows you to introduce different types of variations to your images. These variations include "strong," "subtle," and "region." By selecting the desired variation mode, you can give your images unique and distinctive characteristics. For example, the strong variation mode can drastically change the internal structure, color, and details, while the subtle mode focuses on refining or adjusting certain aspects.
The Zoom Functionality
The Zoom function in Midjourney is not about magnifying or reducing the image size, as commonly misunderstood. Instead, it represents the concept of camera zooming in or out. Zoom in brings the image closer, whereas zoom out moves the image further away. By default, Midjourney offers Zoom out options of 1.5x and 2x, expanding the canvas beyond the original boundaries while retaining the content.
Creating Custom Zoom Levels
In addition to the preset Zoom out options, Midjourney allows you to create custom zoom levels. By clicking the "custom Zoom" button, a dialogue box will appear, enabling you to specify the desired zoom value between 1 and 2. This feature gives you the freedom to further adjust the image and prompt to achieve your desired outcome. For example, you can place an image of a character playing a video game on a screen by modifying the prompt and adjusting the Zoom value.
Making Images Square
The "make square" button enables you to expand the image to a square format without altering the original content. If the original image is in landscape orientation, the expansion will happen vertically, whereas for portrait-oriented images, the expansion will occur horizontally. This functionality ensures that your images can easily fit into a square frame when needed.
Performing Pan Operations
The pan operation buttons allow you to perform specific expansions in different directions. While the Zoom buttons expand the image as a whole, the pan buttons expand the image selectively Based on the specified direction. For example, you can perform left or right pans to reveal additional elements or characters on the sides of the image. By combining multiple pan operations, you can create a series of continuous and Stylized images.
Remix Mode and Vary Region
Introducing Remix Mode
Remix mode is a powerful feature in Midjourney that allows you to modify specific regions of an already generated image. When in remix mode, Midjourney will prompt you to input the desired modifications. This mode opens up endless possibilities for fine-tuning and customization.
Modifying Specific Regions with Vary Region
The "vary region" button within remix mode enables you to modify specific regions of your generated image. By clicking this button, you can draw a rectangle or use a Lasso tool to Outline the area you want to modify. This feature adds a new level of control and precision to your image editing process.
Leveraging Vary Region with Remix Mode
When using vary region within remix mode, you have the ability to specify what changes you want to make to the selected region. This allows you to guide Midjourney towards creating the desired modifications within the defined region. By combining vary region with remix mode, you can achieve highly targeted and customized image edits.
Additional Features and Resources
Liking and Collecting Images
With the heart button, you can like and add images to your collection. Whether it's your own creations or images generated by others, you have the freedom to build your own gallery of favorite images.
Exploring Midjourney Community Feed
Navigate to the web button in Midjourney to explore the community feed. This section showcases a wide range of impressive images generated by Midjourney users. Each image comes with prompt text that you can copy and study for inspiration and learning purposes.
Accessing Learning Resources
To further enhance your learning experience with Midjourney, visit the Midjourney official Website. Explore the resources available, including tutorials, documentation, and other helpful materials. These resources offer valuable insights and guidance on using Midjourney effectively.
Interacting with Image Details
When clicking on an image in the community feed, you can Interact with various buttons and options. You can add a heart to like the image, copy the prompt text or full command, open it in Discord to locate the generated image, save the image locally, and evaluate it based on your preference.
Evaluating and Saving Images
By rating images using the smiley face button, you can contribute to the overall ranking of each image in the community feed. This feature ensures that exceptional images receive the recognition they deserve. Additionally, you can save any image you like by clicking the save button for future reference.
Following Authors and Giving Feedback
To stay updated with the work of specific authors, click the person icon to follow them. This allows you to conveniently access their latest creations. Giving feedback and support to fellow Midjourney users is crucial for fostering a thriving community.
Conclusion
Congratulations on completing this video! In this installment, we explored the powerful features of Midjourney, including the AR and version parameters, upscale and variation functions, zoom and pan operations, remix mode with vary region, and the additional resources available on the Midjourney official website and community feed. In the upcoming video, I will introduce more advanced techniques and showcase the limitless creative possibilities of Midjourney. Don't forget to like this video and follow my channel for more exciting content. Until next time!


 90.8K
90.8K
 50.53%
 2
2
 44.54%

 50.9%
50.9%
 WHY YOU SHOULD CHOOSE TOOLIFY


