


瘋狂!Axioo Pico cjm w217cu給了我們很棒的Intel Atom筆記型電腦,SSD和4GB RAM!
Find AI Tools in second
Find AI Tools No difficulty
No complicated process
Find ai tools
No difficulty
No complicated process
Find ai tools


Most people like

RivalOut

 < 5K
< 5K
 1
1
AI-Powered rival company analysis platform
AI Analytics Assistant
AI SEO Assistant
AD
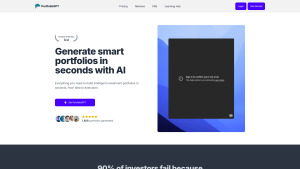
PortfolioGPT
< 5K
 91.92%
4
91.92%
4
AI-powered tool for generating personalized investment portfolios quickly.
Investing Assistant
AD

BrandGhost
< 5K
100%
2
Automation platform for content creators to manage social media effectively.
AI Social Media Assistant
AI Instagram Assistant
AI Twitter Assistant
AI YouTube Assistant
AI Facebook Assistant
AI Repurpose Assistant
AI Lead Generation
AI Scheduling
AI Spreadsheet
AI Content Generator
AD

AI Girlfriend
16.2K
 41.03%
0
41.03%
0
Create and customize your own AI girlfriend for companionship.
AI Chatbot
AI Girlfriend
AI Character
AI Dating Assistant
Pick-up Lines Generator
AD

Undetected
< 5K
0
Free tool to convert AI text into human-like content.
Paraphraser
AI Content Generator
AI Rewriter
Papers
Report Writing
General Writing
AI SEO Assistant
Essay Writer
Writing Assistants
AI Blog Writer
AI Content Detector
AI Plagiarism Checker
AI Detector
Copywriting
AI Reviews Assistant
AI Story Writing
AI Creative Writing
Digital Marketing Generator
AI Checker Essay
AI Script Writing
Novel
AI Advertising Assistant
AI Book Writing
Captions or Subtitle
AI Ad Creative Assistant
AI Product Description Generator
Summarizer
Letter Writer
AI Email Marketing
AI Email Writer
AI Social Media Assistant
AD
Are you spending too much time looking for ai tools?
- App rating
- 4.9
- AI Tools
- 100k+
- Trusted Users
- 5000+
 WHY YOU SHOULD CHOOSE TOOLIFY
TOOLIFY is the best ai tool source.
Browse More Content
Related Articles


Refresh Articles
