


Améliorez les performances thermiques de votre PC avec le Thermalright LGA 1700 Bracket
Find AI Tools in second
Find AI Tools No difficulty
No complicated process
Find ai tools
No difficulty
No complicated process
Find ai tools


Most people like
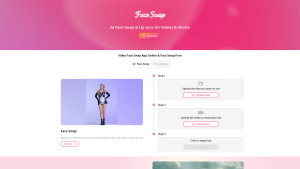
MyFaceSwap

 < 5K
< 5K
 0
0
Free AI tool for face swapping in videos and images.
AI Video Recording
AI Face Swap Generator
AI Video Editor
AI Lip Sync Generator
Fun Tools
AD

TerraPrime
< 5K
1
TerraPrime is a broker-free platform revolutionizing commercial real estate by directly connecting developers with investors globally. Its TerraPublic initiative helps cities secure global investment for sustainable growth, streamlining deals with transparency and technology.
Translate
AI Task Management
AI Documents Assistant
AI Document Extraction
AI Diagram Generator
AI Contract Management
AI Forms & Surveys
AI Scheduling
AI Meeting Assistant
AI Productivity Tools
AI Email Writer
AI PDF
AI Advertising Assistant
Sales Assistant
Investing Assistant
AI Consulting Assistant
Research Tool
AI Product Description Generator
AI Files Assistant
AD

Immediate Edge
< 5K
3
A trading platform for connecting brokers and users for cryptocurrency trading.
AI Advertising Assistant
AI Customer Service Assistant
AI Ad Creative Assistant
AI Trading Bot Assistant
Investing Assistant
Blockchain
AI Charting
AD
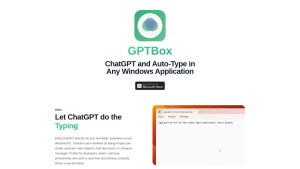
GPTBox
< 5K
6
AI integration for enhanced productivity in Windows tasks.
AI Email Assistant
AI Email Generator
AI Chatbot
AI WORD
AI Productivity Tools
Large Language Models (LLMs)
AI Content Generator
AD

GenTube
112.5K
 48.1%
3
48.1%
3
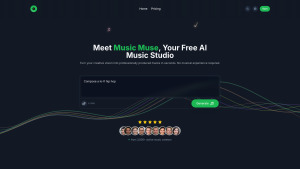
Remember when AI was supposed to make things faster? Stop waiting on image generation and start creating with lightning speed on GenTube today!
AI Content Generator
AI Clothing Generator
AI Tattoo Generator
AI Image Scanning
AI Image Segmentation
AI Charting
AI Landscape Generator
AI Poster Generator
AI Cosplay Generator
AI Anime & Cartoon Generator
AI Pattern Generator
AI Thumbnail Maker
AI Ad Creative Assistant
AI Art Generator
AI Design Generator
AI Graphic Design
AI Interior & Room Design
AI Pixel Art
AI Selfie & Portrait
AI Manga & Comic
Text to Image
AI GIF Generator
AI Photo & Image Generator
AI Illustration Generator
AI Avatar Generator
AI Background Generator
AI Banner Generator
AI Cover Generator
AI Emoji Generator
AI Icon Generator
AI Wallpaper Generator
AI Image Enhancer
AI Logo Generator
Photo & Image Editor
AI Photo Enhancer
AI Photo Restoration
AI Photography
AI Profile Picture Generator
AI Anime Art
AD
Are you spending too much time looking for ai tools?
- App rating
- 4.9
- AI Tools
- 100k+
- Trusted Users
- 5000+
 WHY YOU SHOULD CHOOSE TOOLIFY
TOOLIFY is the best ai tool source.
Browse More Content
AI NEW FR
- C’est quoi le SERP Scraping et pourquoi l’utiliser ?
- DeepSeek R1: L'IA open source qui surpasse ChatGPT?
- EssayGPT Review: Détecter l'IA et Humaniser le contenu
- Création de Documentation de Code Imparable avec Gemini et HIX AI
- AI Humanizer: Transformez votre texte IA en contenu authentique
- Contourner la détection de l'IA : Humbot, votre solution ultime
- L'IA : Détecter le mensonge et son impact sociologique profond
- Maîtriser la détection de l'IA : techniques pour humaniser le contenu
- Déjouer CopyLeaks : Guide Complet des Humaniseurs IA et de l'Intégrité Académique
- Contourner la détection de l'IA : Guide complet 2025 pour le contenu SEO
Related Articles


Refresh Articles
